RE: Technical Setup
Displaying a Toybox Tale on a screen or
television
Supplies
-
Camera with large preview LCD screen for viewing while
making the tales
-
Camera must have A/V (audio-visual) output capability
-
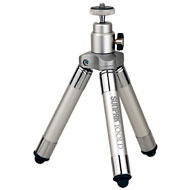
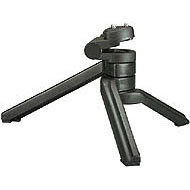
Small camera tripod (recommended:
Sunpak
- 1001D Digital Tripod or
Quantaray
- QT-75 Mini Tabletop Tripod )
-
Small rotating platform for the camera to sit on
-
Board: To bring the camera back farther than the computer
keyboard tray allows, I simply have a think board that the camera platform
sits on. The camera can then be moved physically in and out (zooming)
by moving the board, you can use the cameras zoom feature, and rotate the
camera with the platform. You get a lot of power to control the view
as you play.
-
Video input selector with 2 outputs available (for live
showing and recording to take place simultaneously)
-
Video cable out of camera to video selector
-
Projector or television
Setup
-
Setup your camera on a small tripod and stage (as described
above).
-
Run composite (RCA) or S-video cable from the camera's
output to the input on the protector or television. Make sure that you
have the projector/television input set to where you have the signal coming
in.
-
As you play on the mini-stage watching the view on the
camera, the kids watch the story on the screen (via projector) or on the
television screen.
RE: Recording Toybox Tales to a Computer
OPTION 1: Recording to computer live
Supplies
-
Camera with A/V (audio visual) output capability
-
Tripod and platform for the camera to sit on
-
Video input selector with 2 outputs available (for live
showing and recording to take place simultaneously)
-
Video cable out of camera to video selector
-
Projector or Television
-
Video cable from video selector to projector or televison
-
A/V Capture board for computer (recommended:
Pinnacle A/V 8)
-
Computer (minimum requirements depending on A/V capture board
specs)
-
A massive hard drive to archive the Toybox Tales (4 gigabytes
for every 17 minutes of film)
-
Video cable to the A/V capture board from video selector
-
Audio adapters to come from sound system or camera into your
computers 1/8 inch line in plug
Setup
-
Setup your camera on a small tripod and stage.
-
Run composite (RCA) or S-video cable from the camera's
output to the input of the video selector.
-
Run a composite or S-video cable from video selector output
to either a television or video projector. (Check that you get a
signal from the camera on the TV or Projector before continuing)
-
Out of the other video selector output, run a composite or
S-video cable to your computer for the video card that you will install
later.
-
From your sound system or camera, you will need to run a
sound cord from your audio output into your computer's 1/8 inch line in
plug. (Ask a sound guy or your local tech store for more details on
how to do this, since every sound system is different)
-
Now you will need to install your A/V capture board for the
computer. (Follow the instructions that come with the product)
-
As soon as you get the capture board installed, connect your
video cable that you set aside for the computer. (Test capture for sound and
video)
-
Run through the steps several times until you get setup
right.
OPTION 2: Record to computer later Supplies
-
Camera with firewire capability and video tapes for the
camera
-
Computer with firewire capability (editing software also
needed)
-
VCR or video selector (You can also record the
Toybox Tales on regular VHS tape)
-
Video cable from camera to VCR or video selector
-
Video cable from the VCR or video selector to projector
or television
-
Audio cable from camera or sound system to the VCR (only
required if recording on the VCR)
-
Projector or television
Setup
-
Setup your camera on a small tripod and stage.
-
Run a video cable out of your camera (A/V output) into
your VCR or video selector input.
-
Run audio cable from camera or sound system if recording
on the VCR.
-
Run video cable from VCR or video selector to the
projector or television.
-
Make sure when using a VCR that you are on the input
channel so that you will get a video signal from the camera.
-
Hit record on the camera/VCR/video selector and start the
live tale.
-
Rewind the video tape in the camera.
-
Attach the camera to the computer.
-
Open the capture/editing software of your choice.
-
Follow directions of your capture/editing software
RE: Are you Hidden or Facing the Kids?
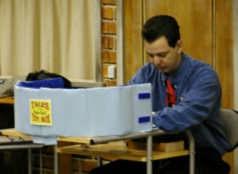 I
am in front of the kids when I do the tales, so that they can see me off to the
right side of stage while the big screen is off to the left side. They
cannot see the actual mini-stage, as they see the back of it, as seen in the
picture to the right. I have done it a few times with my back to the kids
so that they can see what I am doing, but then my body blocks part of the view.
For the most part, they are watching the screen, but being out front lets them
know that you are really doing it live, and they can see when you use large
items or use figures above the set. I
am in front of the kids when I do the tales, so that they can see me off to the
right side of stage while the big screen is off to the left side. They
cannot see the actual mini-stage, as they see the back of it, as seen in the
picture to the right. I have done it a few times with my back to the kids
so that they can see what I am doing, but then my body blocks part of the view.
For the most part, they are watching the screen, but being out front lets them
know that you are really doing it live, and they can see when you use large
items or use figures above the set.
|